FISHBuster Video 📹🐟

Recently I read the book UDL and Blended Learning by Catlin Tucker and Katie Novak.  Many of the concepts resonated with me, particularly around using video, so much so, I had to write about it.  Anyone who knows me as a Technology Integration Specialist knows that I really enjoy video as my medium to teach.  On my YouTube channel you can find many of my brief tutorials and tips.  I find that video provides a great visual and also has so many built-in accessibility tools, which is why I use it.  When watching my videos, you can pause as you go when you want to complete a step.  You can also turn on closed captions if you need to read and listen. You can pull the transcripts and just read all of the steps. You can have the closed captions translated if needed.

I first started making videos when I was a classroom teacher for my students. If you go WAY back in my YouTube channel you can see them. Here’s an example video of a math skill.  In addition to providing students a valuable visual they could refer back too, it also took the work off of me as the teacher.  I have this collection of content, where students hear my voice, and it would free me up to work with smaller groups of students or one-on-one.  If a student was absent, or needed the skill for homework, it was there. I could find a video out there on anything, but in the time it takes to find it, I can create it and so can you. Students like to hear YOUR voice (plus I bet you can make it better than the ones you find).

In my role as a technology integration facilitator, I now create videos on the latest tech tips and updates; as well as commonly asked questions, such as how to bookmark: which is my first video as a tech integrator.  I receive many requests for short instructional videos around a skill. I also receive many thanks for these videos as well. In the grad courses I teach on technology integration, I also use video in an asynchronous model.  The data I have from YouTube, and their analytics, support my views on the effectiveness of video.  As of today, I have over 290,000 views. My sons who love YouTube make fun of me for this number. As a YouTuber, it’s pretty low, but as a teacher it’s incredibly high.  Any one of my tech tips gets hundreds of views, showing me that viewers (which I’m thinking are many staff here) do want and need the content.

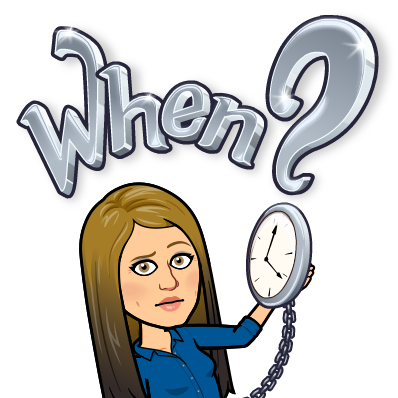
When should you use Video? ⏰

According to Catlin Tucker, If you are going to explain the same thing, the same way, to everyone – make a video. It shifts control over time, place, and pace to the student (UDL and Blended Learning).  It allows students to manipulate the information in ways that are not possible during live instruction (accessibility). Recording a short 5 minute video would be more effective than providing that explanation live when students would only have one chance to “get it.” Unfortunately, when we dedicate significant amounts of class time to a basic explanation of the how for the entire class, there often isn’t time to think about supports and scaffolds that individuals may need to be successful – such as text, translations, pace of instruction, language processing etc.

Why should you use Video? 💡

This now allows YOU time to conference or have small group instruction with students potentially leaving some of that “grading” at school.  Conferencing and/or small group instruction also builds relationships and forms connections.  Video allows students who may be absent to now access your lesson, saving you time from catching them up. Videos also can provide parents with “windows into the work.”  This allows our teaching partners, as Catlin Tucker states, to have the supports they need at home to help our learners. Plus if a parent knows what a child is working on, they are more likely to provide support!

Think of how YOU learn new things.  What’s your go-to? Google? YouTube? Do you pause, rewind, fast forward? Do you have written text resources you can refer back to? Most likely you do not go sit with a person in live-time everytime you want to learn something new.  Having a video resource, that’s brief and engaging, allows for students to be able to go back and relearn, practice, and improve! It allows students to take information in visually and auditory – enable closed captions and they can read the transcript as well, activating all areas of the brain.  When YOU create the video, it adds personalization and familiarity which motivates students to watch it again and again.

Video Tips ☑️

  • Keep it short! Student engagement peaks at the 6-minute mark, so keep it brief enough. There is  subtle decline in engagement between 6 and 9 minutes and a dramatic decrease at 9 minutes. One suggestion is one minute for every year of  school (UDL and Blended Learning).
  • Chunk information, keep it simple.  Better to create a few short videos than one long video.
  • It is KEY to not overwhelm the viewer with irrelevant visuals, unnecessary info, or busy backgrounds.


Plan video instruction in three parts:

    • Pre-video activity- Assess prior knowledge, pique interest, drive inquiry, encourage prediction
    • Engagement around video content – embed questions or guided note template
    • Post-video activity – apply, extend, reflect

Video Tools ⚒️

To create video I’m a huge fan of Screencastify. I find it quick and easy! As a bonus, you can use the Screencastify link to collect data on if students watched the video. My previous blog post here, goes into more of the features of Screencastify! However, there are so many great tools out there to create video. You can even just use your phone and then easily push it to Google Classroom!

To engage with video, Google Forms or EdPuzzle are both great tools.  Embed the video you create and add some questions.  These tools also take away the YouTube clutter (if you send your videos there) AND give you some great analytics and formative data!

What a student (and current teacher) of mine said about my videos 🗣

I should also mention that I generally despise watching videos to learn how to do something (I promise I am going somewhere good with this!). I usually find videos are long with a lot of extra information and commentary – so I end up skipping around and missing what I actually need (I prefer written step by step instructions with screenshots). That being said, your videos are GREAT. They are short, to the point, no fluff and very accessible. I thought that having to watch the “how to” videos would drive me nuts, but it truly did not mind it. If you are willing, I would love to have my students watch them in the fall as I continue my technology journey.”

In Conclusion 💙

Once we embrace the reality that students can, in fact, learn without us monitoring every aspect of their experience, we benefit from exploring models that allow us to design lessons that create the space necessary to work with small groups of students. – UDL and Blended Instruction

Various models of instruction, such as a blended model, station rotation model, playlist model etc. allow us to meet students where they are, break down barriers, and maximize learning opportunities. Video can be one medium that allows us time as educators to implement various models.  We are not one-size-fits-all world, so our classrooms cannot be either. I encourage and challenge you to try just ONE short video to replace direct instruction and free yourself to work with small groups.  Use the video instruction above and see how it goes. Let me know! I’d love to hear!

Take care, everyone!

oFIShally Yours,

Erin Fisher 🐟🐟🐟


SEA my FAVORITES of 2019 👀 😍

2019

Hello friends!! Can you believe this is my last entry of 2019?!! Thanks for sticking with me and reading all of my fishy posts – 33 entries in the year of 2019! It has been a great year in education and there have been so many AWESOME experiences, tools, and lessons that have come up throughout the year. As I reflect on 2019, a professional highlight for me has been the work our district has done with UDL, Universal Design for Learning.  I’ve seen educators really transform from good to great when implementing these principles.  Technology can play a very important role in UDL – offering many opportunities to engage learners, represent content in different ways, and allow learners different opportunities to express their knowledge.  Sharing tech tools and practices that capitalize on UDL has been a passion of mine throughout 2019.  Anyone reading knows I LOVE to share; and although I share many great ideas, a few are certainly on the top of my list. Care to sea  👀 my top ten of 2019 (in no particular order)? Let’s take a look below!

My Favorite Organization ❤️️

In 2019, I became a board member of the MassCUE organization.  MassCUE stands for Massachusetts Computer Using Educators and is a chapter of the larger, national organization, CUE. To say that I simply love MassCUE and all that it stands for would be an understatement.  For years, I was a fangirl of MassCUE, it’s board members, and it’s events.  I remember attending the fall conference and running up to Rayna Freedman (now president), like Buddy the Elf, exclaiming “Hey I know you!” Now, I am a much larger part of the organization and help it to run.  MassCUE has so much to offer educators in the commonwealth. From free PD both online and in person, to Podcasts, Twitter chats, local meetups called CUE-ups, and the largest state-wide conference – MassCUE has something for everyone.  Consider joining today – I promise you will NOT regret it. Click here to learn more about MassCUE. 

My Favorite Conference 🧡

This past spring Medfield Public Schools held its annual DLD conference. However, this year, they changed the theme from “Digital Learning Day” to “Design Your Learning Day.”  Offering many choices centering around good teaching practices.  This conference has always been a highlight of the year for me since I started attending in 2017.  Neal Sonnenberg, an integration specialist in Medfield, has become a dear friend of mine and does so much work behind the scenes with an amazing team to organize a great day.  The keynote for DLD 2019 was a group of teachers or integrators who each gave a passion pitch. This “passion pitch” was an innovative idea that got away from bloated keynotes and really focused on the WHY of teaching. This idea caught on and other districts are now implementing it.  Medfield DLD gives a lot of choices in its offerings throughout the day as well. You can really personalize and maximize your day of learning. I can’t say enough about this conference!  Maybe you’d like to present? Click here to check out Medfield DLD.

My Favorite Google App 💛

I. LOVE. GOOGLE. Really, this one is a tough choice because all of the core Google Apps have so many hidden bells and whistles. Although, there is one Google App that went through a lot of change for 2019. This particular app is amazing for accessibility, offering choices for students, and encouraging collaboration between teachers.  My favorite app of 2019 is Google Classroom! The student selector on the IOS version of Classroom was a pretty nifty little add – but my favorite changes to this app this year has been the BETAs Google is testing out. Originality reports and rubrics are a great improvement to Classroom. I simply cannot say enough about this tool! If you’re not using Classroom to it’s fullest potential, or even if you think you are, check out my tutorial below. I bet you’ll learn something new! You can also check my previous blog post on Classroom here which contains many video tips!

My Favorite Ed-Tech Tool 💚

I have so many Ed-Tech tools that I like and that I try to encourage teachers to use such as KaHoot, Quizizz, Quizlet, Flippity, Flipgrid, Brush Ninja, Tall Tweets, SeeSaw, Epic, and EdPuzzle just to name a few. The tool I always come back to, however, and that I find to be a true game-changer, is Pear Deck. The Pear Deck platform offers every learner a voice.  There is so much choice built-in to this tool when designing a lesson. You can have the deck run whole group or student-paced; you can ask open-ended questions, have students draw an answer, or create a match type question; You can embed videos or websites into the deck.  You can even ask unplanned questions on the fly and hear from EVERY student, not just the singular hand raised. The sky is the limit with this tool. This year, as in all years, they continue to improve and change. Pear Deck paired (haha) up with NEWSELA this year to bring you premade decks that go along with articles. They also offered more lessons in the Orchard for you to try and an improved menu in the add-on for Slides! Pear Deck even joined forces with Microsoft and now works with PowerPoint as well as Google Slides. I believe in the power of this tool so much that I even have a whole category on my blog devoted to it. You can check that out here. Please reach out if you’d like to try this tool – I would LOVE to SHARE THE PEAR 🍐 help you get started!

My Favorite Ed-Tech Blogger 💙

There’s probably no surprise here. Anyone who knows me, knows I talk about one particular blogger and his great ideas quite frequently.  I follow and/or subscribe to many excellent ed-tech/education blogs: Practical Ed Tech by Richard Byrne, I Heart EDU by Meagan Kelly, Tech Tips 411 by Jennifer Hall, Ditch That Textbook by Matt Miller, The #EDUGif Guy Jake Miller,  and many more. Keeping up with all of the great ideas out there is a job within itself, but one particular Ed-Tech blogger makes it pretty easy. It’s none other than Eric Curts author of Control Alt Achieve. Not only does he have a great blog, but he also hosts a monthly live meeting that anyone can join. My schedule has only allowed me to join once, but I’ve watched the videos back of these meetings quite often.  Eric is the ultimate sharer; he creates really great activities using Google Apps and puts them out there (for free).  He also finds many great activities using Google Apps and puts them out there as well, highlighting other AWESOME teachers.  If you’re looking for a great Ed-Tech blog to follow – Eric’s is my top choice!

My Favorite Video Tool 💜

Video is a great option when looking at representation or action and expression – two principles of UDL.  Video is another way to reach all learners and can be very engaging.  Take a look at our students today – how often in their free time are they watching YouTube?  So, why not use video in the classroom! Let them view videos of content on platforms such as YouTube, Discovery, Edpuzzle, Khan, or let them create videos with platforms such as Flipgrid, Adobe Spark, or SeeSaw.  Video is powerful and I, myself, use it often as a teaching tool. I even respond to emails with instructions using video. I feel that it can reach more learners having the video to see and even pairing in the text with closed captioning to read.  My favorite video tool to use is Screencastify! I like this tool so very much because it’s an extension for Google Chrome, which means I do not have to login or go to a separate website to use.  The videos go right into my Google Drive and it’s so very quick to get them out to viewers.  This tool works seamlessly with YouTube, Wakelet, EdPuzzle, Flipgrid and many other video hosting platforms. Again, there is so much choice within Screencastify in terms of showing the webcam or not, using drawing tools to show a skill, recording internal audio, pausing the video in the middle, and so much more.  To learn more about this FABULOUS tool that is my favorite video tool of 2019, click here!

My Favorite Extension ❤️️

I have so many Google Chrome extensions, it’s really hard to pick a favorite.  You can find an extension for anything! A few extensions I use daily such as Grammarly, Bitmoji, and Emoji Keyboard for Chrome. I love extensions so much that I used to run into the problem where I had so many running that my browser slowed down.  Well, that’s where my FAVORITE extension comes in. Extensity is a great extension that allows you to turn on and off extensions with a simple click of the mouse. This keeps your Chrome Web Browser running at top speed, while also allowing you to use your favorite extensions when you need them. Check out how to use it below!

My Favorite Font 🧡

My favorite Google Font(s) of 2019 is the newly added Lexend font(s).  This year Google teamed up with Thomas Jockin typeface designer and founder of TypeThursday. Together they instituted the Lexend fonts in Google Docs which have been researched and are meant to improve reading speed.  You can read more about these cool fonts here! 

My Favorite Google Add-On 💛

Google add-ons, much like Chrome Extensions, extend the productivity of Google Applications.  You can do so much with add-ons.  Autocrat is one of my favorite add-ons for Sheets. I love how it creates a mail merge and allows you to automate emails with a click of a button. Although I do love Autocrat and the cool things it can do, by far my favorite Google Add-on is MAGIC RAINBOW UNICORN.  Simply because it’s fun! This add-on works for both Docs and Slides!

My Favorite Google Docs Trick 💚

This year Google Docs released a live word count tool that counts as you type! You have to manually turn this on, but what a great visual for students to have especially for those college essays! See the video below of how to use this great tool!

Wow! I could go on and on with more of my favorites, but a top ten seems just right for now! What are your favorites?

Stay tuned as I post in 2020 about GIFs, QR CODES and MORE!

Happy New Year Everyone! Take Care!

Bitmoji Image

oFISHally Yours,

Erin Fisher 🐟 🐟 🐟


Get “Hooked” on Screencastify! 🎥🎞

Bitmoji Image

Hello there!  I’m back!  Did you notice I took a nice summer break? As educators, we all need to take some time and step back to relax. During that time, I made some changes! Did you notice?  I’m excited to show off my new themed, ready-for-the-school-year-ahead, blog!

How about trying a new tool for the new school year? Imagine, sending a video of yourself, or just your voice showing something off, to parents and students before school starts. How about offering students options in how content is represented? Well, I have the answer for you!

For a GREAT tool this week, I’d like to showcase a favorite of mine: Screencastify!  I’ve mentioned this tool in my blog many times before. However, like all tech tools, Screencastify has UPDATED! I’ve been with this awesome tool since the beginning. I’m an original subscriber – an OG! Through the years, I’ve watched popular EdTech bloggers showcase other screencasting tools, only eventually to move to the best: Screencastify! I’ve known this has been the #1 Screencasting tool since the beginning. It’s FREE and it’s AWESOME! I recently spoke about this tool on the MassCUE Get a CUE Podcast, hosted by Brandon Hall! I spoke about all of my favorite features I listed below.

Screencast

Screencastify is an extension that you can install using the Chrome Web Store.  One installed, it will appear where your extensions appear next to the Google Search Web Omnibox (Yes, that’s a search box – but that’s another post).

Simply click the icon once installed, and you have the option to start recording what’s on your computer screen and record your voice along with it, if you choose.  If you computer is connected to an interactive board, you can write on the board and it will record that as well. Screencasts can be used in a variety of ways such as:

  • FLIP your classroomHave students view the material prior to coming in the classroom or while working in small groups
  • TutorialsExplain how to do a skill or process or have students provide a video explaining a process!
  • Station RotationWhile in small groups, have a short video students can refer to for direction
  • Explanations for Parents: Send a video home to parents explaining something in the classroom or on the computer (like how to access your website or homework).
  • Sub Plans: The best sub plan – Screencastify + Google Classroom!  Don’t worry about the students and/or Sub missing something, explain it with Screencastify!

Record Video

Not only can you record your screen, but you can also choose the camera option and video yourself or something else! Maybe you want students making a commercial or maybe students need an opportunity to pause as they record. How about having students record how they solve a math problem?! Once recorded –  you can also upload this video to other platforms like Flipgrid, post it to Google Classroom, or embed it into Slides!  Click here for more information on Screencastify + Flipgrid (seriously, this resource is one of my best workshops ever!).

Powerful Student Ideas

I was fortunate enough to assist teachers and students this past school year on a few amazing projects that used Screencastify. Two that stood out were a an app smash of Screencastify and Slides with Stop Motion Animation (inspired here by Eric Curts), and also a project on Foley Artistry.

In 6th grade science. we had students create stop motion animation of the digestive tract. Once finished with their slides, they layered Screencastify over their project and narrated the video to explain each phase of digestion.  It was pretty cool!

Another AWESOME project we worked on this year was in Music class.  Students were studying Foley Artists. Foley artists are responsible for the sound effects in film. Students watching a video of a Doritos Commercial and then had to go in and be Foley Artists.  This is perhaps one of the MOST FUN ways I’ve used this tool. I’ve included the original commercial and the studente example below. Pay special attention to the sound effects (crunching, falling, etc)

Original: https://youtu.be/HwkeEgESR3g

Student Example: https://drive.google.com/file/d/1TSJh3Us3FuqXW-P6jqVyuhdtEVC4MEW2/view?usp=sharing

Screencastify has a great resource area with many ideas on how both students and teachers can use this great too. You can access that resource area by clicking here. 

Integrations

Perhaps one of the most a alLURing (get it, Lure, fish pun – haha) aspects about Screencastify is its ease to push out to Google Classroom and other areas.  This great tool integrates, easily, with many popular platforms! Record your screencast or video, and BOOM – in less than thirty seconds you can push it out to whomever you’d like to see it.

  • Google Classroom: Once your recording is done, you will be brought to a finishing screen to preview. Click the Share icon and you have a few options. Choose the one below and quickly send video to Classroom.

  • Youtube: Similar to above, rather than choosing Classroom, choose YouTube!

  • Quickly Email: Upon finished the recording, you can also copy the Google Drive link or YouTube Link.  Simply paste it in an email and send it off (Or schedule it – see here)!
  • Google Drive: Screencastify AUTOMATICALLY sends the video to your Google Drive in a folder called Screencastify.  You can link an entire folder somewhere if you’d like! Be sure to title your videos once they’re created.
  • Wakelet: If you don’t want videos taking up space in your Drive, you can also send them to Wakelet! You could create Wakes for various concepts and push videos to categorized areas quite easily!

  • Google Slides: It’s very easy to embed your Screencasts into a Google Slide deck. Choose insert video and rather than YouTube, choose from Drive!
    • Pull audio now from your screencasts and use the clips on slides! Check it out here!

Pro Tip

A pro tip I suggest, when using Screencastify, is to change the shared settings on the folder in your Drive.  Often I will quickly grab the Google Drive link to my video and put it in an email to send off. Only to have the recipient let me know they don’t have permission to view.  By setting the shared permissions on the folder to “Anyone on the web can view” you avoid this issue.  Sometimes, you may post a link in Google Classroom to a video for future students, this shared setting will avoid any delays in those viewing the video. Be sure to only share links of the videos, and not the link to the WHOLE folder!

Privacy

If you’re concerned about privacy, fret no more! Screencastify is both FERPA and COPPA Compliant.  For more information, you can read about their privacy policy here! 

FREEMIUM

If it’s free, it’s for me….

Screencastify is perhaps one of the most generous free tools out there on the EdTech scene.  Once installed, you get 50 recordings with a cap of ten minutes each PER MONTH!  Also, if you make an error, just hit the re-record button (see below) rather than start again and it will not count against your monthly quota!

Premium

If you decide to go that route, and upgrade to premium, it’s only $24 a year.  For that $24 you get an unbelievable amount of features! You can create GIFs out of your Screencasts, pull the MP3 Audio from your file, export the file as a video file, unlimited videos and time limit, AND there are a few editing tools that you have access too as well. You can take a look at the plans here.  Reach out if you want any tips and tricks on the premium plan, I’ve had mine for four years!

As always, reach out for more help with this AWESOME tool! Feel free also to search my blog with the term Screencastify to see other posts!

Take care everyone! I look forward to getting you hooked on EdTech!

oFISHally Yours,

Erin Fisher 🐟 🐟 🐟

CAST your (student) voice! 🎣 📣

Bitmoji Image

Cast Student Voice

What do we do about apathy? There are so many obstacles when it comes to teaching, so many hills and valleys, but what do we do about the student or adult who just does not care?

Don’t try and fix something you love – but look at what doesn’t work. We all have to try and close the gaps between our achievers and those who are not reaching learning targets.  If we want to believe every child can learn, we should not be proactively taking them out of the game and expecting them to do something else. We need to find ways for them to successfully access the curriculum. We need to give all of our students a voice. 

Do you have students apathetic to learning?  Engagement is key in decreasing student apathy. Offering students choice increases access to a goal and can also provide engagement.  As educators, we cannot assume that our preferences as teachers are their preferences as learners.  We may think a lecture is best, taking notes is best, showing a video is best, technology is best, but this may not be what works for every learner in front of us.  Data doesn’t lie, and if we have gaps in our data between those achieving and those who are not, then what we’re choosing may not be what is working.  

When students take ownership of their learning, they are more engaged and thus have greater success. As educators, we often decide the activity surrounding the lesson. We may even get excited about our plan, but some of our students may not.  Again, our preference may not be theirs and our activity may not be accessible to all learners despite what we may think.  Surveying and asking kids what they’re interested in can assist in learning what they prefer. Google Forms are an awesome tool for this and it gives us valuable data to say: “We’re doing this becauseI have data that shows…” If we want to steer the direction of the lesson, providing some choices for students and allowing them to choose a preference can also work.  What are some choices we can provide? How about some options that give our students a VOICE! Let’s take a look below:

Google Forms Bitmoji Image

Google Forms are a great tool for assessment, but they are also a great survey tool as well. They can really assist us as educators in learning our students’ preferences as learners.  This is a great post by Catlin Tucker on using Google Forms to get to know our students.  If we can gather information on our students’ likes and dislikes it can help us be more effective as educators. Catlin even provides a FREE Google Form you can use to get to know your students.

Podcasting sound on

OMG, have you tried Anchor?  WOW this podcasting app, and web tool, incredible!!! It is also FREE!  Thank you to Brandon Hall, tech integrator from Pembroke, for walking me through this awesome tool.  Podcasting has exploded on the scene with both students and adults listening to Podcasts and creating podcasts! There’s a podcast for everyone really. You can find a series on sports, education, mystery etc Many of your favorite TV personalities even have a podcast.  So, how does this apply to the classroom – let’s have kids MAKE a podcast and cast their voice! What an incredible way for a student to show learning, and the best part, you could listen to it on your drive home, or while correcting papers. Reach out if you would like to start Podcasting with your students! Check out this great Google Slidedeck here on how this can be used in the classroom and Brandon’s overview of Anchor below!

This is a great article on how to use Podcasts in education. Our own Tori Cameron has a popular podcast channel on all things STEAM that you can listen too as well, and she is the guru when it comes to podcasting!

Video Bitmoji Image

Student video is also a great way to allow students to cast their voice! It is also another great way students can showcase their learning. Flipgrid, SeeSaw, and Screencastify are all wonderful tools that allow students to create video easily to showcase knowledge.

You could use Wakelet to put all student video in one place! Wakelet now integrates with both Flipgrid and Screencastify and would provide a great curation example of student video!

As a teacher, you can also create video and flip your classroom.  Check out the video below from Bill Silva, East Bridgewater Biology Teacher, that he uses with students.

Translator App Bitmoji Image

Recently, Microsoft unveiled their new translator app. This app is incredible and is available across all platforms. I was playing with it the other day, thanks to my pal Colleen Terrill, and it has many more features than my previous fav – Google Translate.  This article here describes the features and functionality of the app.  If you are traveling to a country where you cannot speak the language, or have EL students you wish to communicate with, give this app a go and provide voice to your student!

Tech Tip of the Week: Google Voice Bitmoji Image

Did you know your Google Account can be associated with a phone number? You can then link that number to your actual number on your mobile phone.  You can also use Google Voice as an app and on the web.  This would be useful if you wanted to text students or parents, but didn’t want to give out your personal number and did not want to pay for an additional number or phone. Click here for an article from another Tech Blogger on his top reasons he uses Google Voice in the classroom!

How will you give your students a VOICE and let them be heard?

Take care!

oFISHally Yours,

Erin Fisher 🐟 🐟 🐟

“WAVE” to the Camera 🌊 👋 📸 🐟

Another great week was had here in East Bridgewater 😀! I have had the pleasure of being between many classrooms and buildings this week, as I get in a record number of steps 👣! A big hit this week was VIDEO! For our PreK-6 classrooms, it was setting up and using the new document cameras 📸, and for 7-12 it was looking at video programs for the Chromebooks!  Having the ability to create and share video is huge right now in our school system, as I’m sure it is in many.  Creating video allows the teacher to remove him/herself from the front of the room. Students can work in small groups, get more one-on-one time with the teacher, and have the skill to go back to if the video is present! The best part – there are so many FREE tools to make these videos 📹! Let’s look at the WAVE 🌊 of options below!

Teacher Created Videos 

Did you know that you could use your document camera to create teacher-made videos?  Imagine a student being out, and all he or she needs to do is go to Classroom and watch your video. Imagine a class where you can take a small group to work with, while others watch the teacher-created video and you can later assist them. If you’re at Central School or Middle School this is an option for you! Reach out and we can talk!  Click here to access directions for your document camera

When not using a document camera, ScreenCastify is my personal favorite to use to make video tutorials, or just plain old video clips. This is a GREAT extension. It’s free and easy to use! Bonus – they just came out with some new editing tools as well!

Video Editing Tools for Student Projects 

I had done a previous post, click here, on some great options for student video projects.  However, this week I got to show a few newer tools to the students in 8th grade Enrichment with Mr. Shea and Mrs. Ronayne.  We took a look at WeVideo, Animoto, Openshot Editor, and just using the camera app on the Chromebook itself.  You can find the camera app on a Chromebook by hitting the magnifying glass key and displaying all the apps, or simply going into Apps on the toolbar. Once the video clips are made, it’s pretty easy to import them into any one of these programs, add music, pictures, and push it out to YouTube or Drive. What a great project idea!

The NEW Youtube Editor 

Coming soon….YouTube has just released the Beta version of YouTube Studio.  According to YouTube, soon they will release a new editor where you can cut, combine and add cards to your uploads! As this comes out, look for video from me highlighting the new features! For those that like video and video projects, check out the new YouTube Studio by clicking here.

Easily send video to Google Classroom 

One of the nicest things I’ve ever seen in Google Classroom, is when an administrator posted a video of students and teacher doing something well. All of the staff who saw it commented and it was a big love fest. It’s so great to celebrate the good that is happening all around us and it’s VERY EASY when using Google Classroom to do this!  First, install the Google Classroom App on your phone and/or ipad. Go into your settings and allow the Classroom app to access your photos/videos. Take a video as your normally would. Go find your video, and as if you would text it, choose the send button. When sending, choose the Classroom App and BOOM! It will put your video RIGHT into the Google Classroom of your choice. You can also add a description as well. What’s nice about this, is that the video is private between you and your class and/or staff! 

So much fun!!! What are you using in terms of video in your classroom? Let me know!

Have a great day, and thanks for catching the “wave!”

oFISHally Yours,

Erin Fisher  🐟 🐟 🐟


Let’s Get Reel….📽️ 🎣 🎥

WOOOOHOOOO!

The Chromebooks are back at the JRSRHS! What a great week to be a Viking! There was a lot of excitement this week (and a lot of unboxing and configuring too, lol)! What an awesome, crazy time of year!  Speaking of crazy, it’s important we remember to take care of ourselves at this time too. We’re so busy taking care of everyone around us, we often neglect ourselves.  George Couros had a great blog post this week, which you can read here, titled 3 Ideas For Taking Care of Yourself Before the Break. He reminds us: It’s okay to need a break. Learn to say no. Take care of yourself.  So, I hope you’re finding time for you…remember, I’m here to help if you want it.  💻 💻 💻

The POWER of Video 📽️ 

Video is a powerful tool for learning.  Take FlipGrid for instance, it has hit the Twittersphere by storm! Why….because video is powerful!  As a teacher, creating video is so easy, and your students will LOVE it!  Picture having small groups, and rather than students needing to ask you or each other what to do, they can just refer to video inside Google Classroom. You can create videos privately and share them privately – and students love listening to you much more than say Kahn Academy. Video is a great tool for online teaching or a flipped classroom! Videos are also great for parents to refer to as well to help their children with certain skills.  VIDEO does NOT replace the personal interaction or connection of a teacher and student, but can work really well for reinforcement, practice, an introduction of a topic, or when a student may be absent.   Check out the tutorial below about creating video – it’s easy and FUN and best of all – students LOVE IT…because they love you!

Screencastify:

Your phone:


View YouTube Videos  – Clean and Safe 🎞️ 

Once you have videos you enjoy using in the classroom, it’s great to have a way to watch them safely.  Viewpure does just that. Take a look at the GIF below for a brief showing of Viewpure.


 Ideas for Video Creation with Students 🎥 

Who doesn’t love to see a video of their own child learning?  Screencastify is a great Chrome extension for students to use on their own Chromebooks to create video. The video will go right into a student’s drive and then he or she can share it with the teacher or embed it on a Google Slide. Imagine doing book reviews with video and hearing a child or young adult describe a great read?! Take all of those videos and embed them on a slide deck to share with the class or parents? What a great project! Read this article here for even more ideas of how we can have students create videos for the classroom!

Creative Alternatives to Movies before Break 🍿 

This is a GREAT article by John Spencer that features some creative activities to use with students before the break. Many of them are upper level, like Genius Hour, History Mystery, or Wonder Weeks. If you’re looking for something to do with students before the break, that will engage, this is a great read.

Holiday Tech (updated) 🎄 🕎 

To make sure we get the latest HOLIDAY activities ….

My favorite Blogger – Eric Curts – put out another post this week on winter activities in general which had a great link for MORE PIXEL ART as well as EMOJI WRITING IN DOCS!  Click here for  his awesome post!

You can also click here for my Google Doc of Holiday Tech that spans PreK-12. I’ve added a few items to it this week, like Rainbow Maker in Docs! (see GIF below)


“When children create for the world they make it good. When children create only for their teacher they make it good enough.” – Rushton Hurley @rushtonh

Have a great weekend everyone, and enjoy the Chromebooks JRSRHS!

oFISHally yours,

Erin Fisher 🐟 🐟 🐟